|
| Just
for Kids Issue
|
|

|
 |
Letter
from the Editor
 As the latest TV commercials
declare, our kids are not getting enough art or opportunity for creativity in most
school systems. Budget cuts seem to start there. It does not always cost money
to be creative and I believe things like working with colors assist the mind with
scholastic achievement in area's of math, science and so on. I used Montessori
techniques when my kids were young to stimulate them. I did not have the kind
of money for a Montessori school, so used the public library to learn all
about it to grasp the basic concepts. That was 20 years ago. These days
we have the net. As the latest TV commercials
declare, our kids are not getting enough art or opportunity for creativity in most
school systems. Budget cuts seem to start there. It does not always cost money
to be creative and I believe things like working with colors assist the mind with
scholastic achievement in area's of math, science and so on. I used Montessori
techniques when my kids were young to stimulate them. I did not have the kind
of money for a Montessori school, so used the public library to learn all
about it to grasp the basic concepts. That was 20 years ago. These days
we have the net.
I know my kids benefited
very much starting with their first bright mobiles in their cribs and interesting objects in
their baths. I tried to frame the activities below around normal household ingredients
and practical clean up with difficulty level of 2 on a scale of 10. Some are
ideas here are so cool adults may want to apply a few concepts to their own crafting.
To change the subject I recently found Keebler has a very cool site for
kids. Click here to see that!
Stay tuned for the next edition of Mabel's Newsletter because that will one of our
best issues for adults!
All About Bubbles
 Blowing bubbles can be a great
event. Seeing who can blow the biggest can also be very fun. Objects
used to blow the bubbles can be made from just sticks and wires around the
house. I saw a very pretty wand recently with a heart shaped wire top affixed
to a stick. The wire wrapped all the way down to the bottom where it held a
big marble at the end and simply had that "Harry Potter" look. I
wish I could have supplied a photo of it. We store our bubble mixture in a
mason jar, but if you are going to make big wands, you will want to dip the wands
into a bucket of the mixture. Use the following to make bubble blowing
liquid: 1/2 cups of water to 1/2 cup of dish soap. Stir do not
shake. Adding a little salt, sugar, and glycerin can make better
bubbles. Blowing bubbles can be a great
event. Seeing who can blow the biggest can also be very fun. Objects
used to blow the bubbles can be made from just sticks and wires around the
house. I saw a very pretty wand recently with a heart shaped wire top affixed
to a stick. The wire wrapped all the way down to the bottom where it held a
big marble at the end and simply had that "Harry Potter" look. I
wish I could have supplied a photo of it. We store our bubble mixture in a
mason jar, but if you are going to make big wands, you will want to dip the wands
into a bucket of the mixture. Use the following to make bubble blowing
liquid: 1/2 cups of water to 1/2 cup of dish soap. Stir do not
shake. Adding a little salt, sugar, and glycerin can make better
bubbles.
Making Sidewalk Chalk
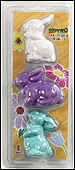
Sidewalk chalk is so fun, but runs as high as $24.00 on
the stores. You can make your own very easy. Unlimited creativity and easy
clean up is the beauty of side walk chalk in the first place. Here you will
actually use used toilet paper rolls as the mold! You can also get creative and use
heart shaped soap molds and other neat shapes. Presentation can be in a simple
bucket. Crayola beat me on this one. To see their idea's press their
sidewalk bunnies to the right. I still feel you can use soap molds, candle
molds, or even used toilet paper rolls.
Ingredient's?
- 1 c plaster of Paris
- 1/2 c cold water
- powdered tempera paint or
food color
- molds, even cup cake
holders will do
How to?
- Combine all ingredients,
keeping in mind that the amount of paint used correlates with the
intensity of the chalk color.
- Pour the mixture into
candy or Popsicle molds.
- Let dry.
- Have fun!
Tips
- Lining molds with waxed
paper will make removal of the chalk easier.
- The chalk works best just
after it has dried and is removed from the molds.
- Toilet paper tubes or 5-oz
disposable cups may be used as molds.
- Acrylic paint may be used
instead of tempera, but may not be non-toxic.
Home Made Sand Art

Sand art
can be very expensive in the stores and more commercialized than we care to
know. In case you do not have sand in your back yard, cornstarch or
salt will do just fine. With cornstarch you would need to mix dry
tempura paint to achieve colors, where as with salt you can simply shake it
up in a zip lock bag with your favorite food color and lay out to make sure
it dries. The same applies to fine sugar, and unfortunately they can
eat the product. Store in zip locks or airtight containers. Once
colors are layered in a jar a think stick is used to push the colors down
and give as much of a marble effect as the child desires. Click here to see what others are
doing with sand art! I even saw another group layering candy as
art, but who would want to baby-sit after a child ate that much sugar?
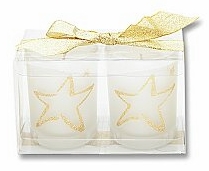
Frosted Candle Votive Holders for Loved Ones
Everyone has plain old glass sitting around. You can transform a
plain glass
bottle or drinking glass into a beautiful frosted candle holder by rolling the glass in school glue and then
rolling in fine salt. The glue dries clear so
you need not worry about that. The salt gives a beautiful glow when a votive
or tea light are burning! We find tea lights with cups easier clean up. Never
clean your masterpiece in the dishwasher. For best presentation of a gift,
touch it off with a ribbon that matches the color of your work.
Easier
yet, you can also take a four ounce glass, and tape a photo inside it, (like a rose
or dragonfly) up against the glass, and with a fine paint brush, paint glue around
object. Then sprinkle with fine salt. You can even color the glue with
food coloring. So, with this method you may not desire to roll the
entire plain piece of glass in glue. I have also seen kids take a piece of
wire, form a heart and glue that to the already decorated glass. It is very
beautiful. Want to make more of a statement? Glue glass looking gems to your
creation. They are cheap and elegant.
Krylon also sells a
frosted glass finish and I recommend that for spraying over stencils to more simply
decorate plain glass.
Soap on a Rope
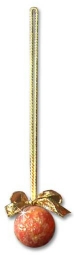 Making soap on a rope has always been my all time
simple favorite project for kids. All you need for each ball is two bars of
glycerin soap grated in the food processor and a beautiful 24 in cord of reach
creation. Clearly Natural sells a variety of colors in the soap section of
most supermarkets and they runabout .80 cents each. Making soap on a rope has always been my all time
simple favorite project for kids. All you need for each ball is two bars of
glycerin soap grated in the food processor and a beautiful 24 in cord of reach
creation. Clearly Natural sells a variety of colors in the soap section of
most supermarkets and they runabout .80 cents each.
When the soap is shredded a little
fragrance oil can be added before the kids make hand hard snow balls with it.
I put a little tape at each end of my cords so they do fray and then tape the two
bottoms together. They will end up going in the middle of the soap to anchor
the rope. To insert you have to pull the snowball in half, lay the cord to the
center of the soap and then firmly press together again.
As you see to the
left we added a pretty gold foil bow and this looks great hanging from the neck of
the shower. Just be sure to pack them tight!
Mega Crayon & Play Dough
 You will need a large box of crayons with the
wrappers taken off and a well greased cupcake holder. Let the kids break up
the crayons and arrange them in contrasting colors in the cups. Melt at 350
degrees until just melted and use a toothpicks to swirl the colors around. Pop
in the freezer for a bit and wallah! You have a mega crayon. You will need a large box of crayons with the
wrappers taken off and a well greased cupcake holder. Let the kids break up
the crayons and arrange them in contrasting colors in the cups. Melt at 350
degrees until just melted and use a toothpicks to swirl the colors around. Pop
in the freezer for a bit and wallah! You have a mega crayon.
World's Best Play Dough Recipe Ever
When your child pounds,
punches, pulls, rolls, cuts, stretches and squeezes the dough he is
developing the muscles in his fingers and hands. When there is more than one
child involved, there is tremendous opportunity for learning to share and
take turns as well as develop language as they talk together about what they
are doing.
Measure into large bowl:
3 cups flour
1/2 cup salt
1/4 cup vegetable oil
In a 2-cup glass measuring
cup, put (in this order):
1 Tablespoon alum (white
spice section store)
Food coloring of desired intensity, Red, Yellow, and Blue are Primary
Boiling water to equal 2 cups liquid total
Add to liquid to flour
mixture. Stir well with a heavy spoon until entire
batch is thoroughly blended or just let a food processor do it. The dough
will be quite moist -- but do not add
more flour. As it sets overnight the moisture is absorbed by the flour and
the next day the play dough is "just right". Store in zip lock
bags for separate colors or an airtight container. Unsweetened Jell-O can
also be used to add color and great smell. This would be added just as
you are done mixing. Knead well just before it is first used.
Mega Hershey Kiss
 You can make a big Hershey�s kiss by plugging a
well greased funnel and then pouring in your chocolate or layers of colored
chocolate until cool. Place in freezer for a few minutes so it will pop out hard and
shiny. The kiss can be as big as your
funnel! Wrap with aluminum foil and
attached a loving message that sticks out. To obtain the chocolate you may
want to melt dark chocolate chips, very gently, and perhaps layer with milk
chocolate chips. White chocolate is pretty but scalds easy so use care when
using white chocolate for this project. This idea will come in GREAT for
Christmas. Other color foils can be pretty too. You can make a big Hershey�s kiss by plugging a
well greased funnel and then pouring in your chocolate or layers of colored
chocolate until cool. Place in freezer for a few minutes so it will pop out hard and
shiny. The kiss can be as big as your
funnel! Wrap with aluminum foil and
attached a loving message that sticks out. To obtain the chocolate you may
want to melt dark chocolate chips, very gently, and perhaps layer with milk
chocolate chips. White chocolate is pretty but scalds easy so use care when
using white chocolate for this project. This idea will come in GREAT for
Christmas. Other color foils can be pretty too.
Jell-O Air Freshener
 Okay, this is a stretch but I read it in the
newspaper so it must be true. For this project you need clear plain old Jell-O,
a small mason jar and a little lace. Fragrance oils would be about 1/4 ounce
per four ounces of Jell-O. Cut the lace in a 6 inch diameter
circle. You may even want to put embeds at the bottom of the creation and pour
just enough clear Jell-O that they will set and cool before you pour the
remainder. If you do not, your objects will float to the top.
Plain old food color will give you color and you can even layer and keep
cooling. When it comes to scent, the big question, it will most likely cloud
your Jell-O and oil based may or may not mix well. Adding a teaspoon of borax
to the hot water may help the oil and water fuse. I have not tried this yet, but I
sure plan to. I assume the freshener will not have allot of scent throw unless
under a vent and will evaporate over time since water is involved. Okay, this is a stretch but I read it in the
newspaper so it must be true. For this project you need clear plain old Jell-O,
a small mason jar and a little lace. Fragrance oils would be about 1/4 ounce
per four ounces of Jell-O. Cut the lace in a 6 inch diameter
circle. You may even want to put embeds at the bottom of the creation and pour
just enough clear Jell-O that they will set and cool before you pour the
remainder. If you do not, your objects will float to the top.
Plain old food color will give you color and you can even layer and keep
cooling. When it comes to scent, the big question, it will most likely cloud
your Jell-O and oil based may or may not mix well. Adding a teaspoon of borax
to the hot water may help the oil and water fuse. I have not tried this yet, but I
sure plan to. I assume the freshener will not have allot of scent throw unless
under a vent and will evaporate over time since water is involved.
Treasure Hunt
Everyone
loves a treasure hunt and so do I! A year ago I was babysitting a few
four year olds and a six year
old. Perhaps they were babysitting me. The six year old ran
interference and had her brother and sister all get buckets and put bandanas
on their heads because they were going to a sand box behind my house to find
some buried treasure. I think the bandanas helped in the pirate spirit
of things, because if I was missing any jewelry they were going to get
it. Well, the six year old already had things planted and that was a
blast  watching them dig through the sand for an hour. I kind of wanted
to join them. They were very serious about their mission. They brought
back pretty shells and some play jewelry the six year old had planted and a
few other things from the house I even forgot I even had. I had to call it
quits when they were eyeing my cat. They figure if she was in the sand
she was fair game. But I think giving them each a copy of an old fashioned
looking map with hints is also very cool. That would be for a long
term babysitting job! watching them dig through the sand for an hour. I kind of wanted
to join them. They were very serious about their mission. They brought
back pretty shells and some play jewelry the six year old had planted and a
few other things from the house I even forgot I even had. I had to call it
quits when they were eyeing my cat. They figure if she was in the sand
she was fair game. But I think giving them each a copy of an old fashioned
looking map with hints is also very cool. That would be for a long
term babysitting job!
Older kids
seem to like those plastic eggs with movie tickets in them, gift cards, but
cash is preferred, no checks. Another neat thing I learned this Easter
when at a loss of things to do, was to throw 100 pennies up in the air and
who ever picked up the most won a certain prize. Since my kids are
grown, the prize was a dinner out. I would like it better next time if
a few eggs contained specific chores.
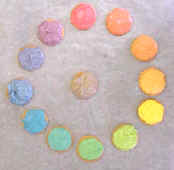
Decorate Treats!
 If I can by pass part of a fun project I will.
In this case my time is not worth baking cookies or treats that may come out wrong
anyway. I like to buy the plain old ginger bread men and other plain cookies
and treats and just let the kids go wild with decorating them. So the key is
to have a wide selection of cake decorating items on hand you can always use later
if the occasion arises. This includes Rice Crispy treats that can even be
dunked half way in melted chocolate and set on wax paper to dry. After that
they can still be decorated! The photo to the left is an edible color wheel
with plain vanilla wafers, white frosting and food coloring of choice. If I can by pass part of a fun project I will.
In this case my time is not worth baking cookies or treats that may come out wrong
anyway. I like to buy the plain old ginger bread men and other plain cookies
and treats and just let the kids go wild with decorating them. So the key is
to have a wide selection of cake decorating items on hand you can always use later
if the occasion arises. This includes Rice Crispy treats that can even be
dunked half way in melted chocolate and set on wax paper to dry. After that
they can still be decorated! The photo to the left is an edible color wheel
with plain vanilla wafers, white frosting and food coloring of choice.
T
Home Made Finger Paint
2 cups cold water
1/2 cup cornstarch
3 Tbsp. sugar
food coloring
Add to a saucepan the cornstarch, water, sugar & over low heat cook, constantly
stirring mixture, until it is well blended. Get 4 plastic containers & pour
equal amounts of blended mixture into each container. Use a different food coloring
color for each bowl mixture & mix. Freezer paper is the cheapest way
to accommodate little aspiring artists.
Some kids like to add fragrances and scents to paint. Some
suggestions are: shampoo, lemon or almond extract, peppermint extract, hand lotion,
perfume or cologne, fruit drink mix, chocolate powder, coffee. Adding spices adds
textures and fragrance cloves, nutmeg, cinnamon, basil, sage, or others.
Did You Know?
-
Bubbles last longer in cold
weather because their lifetimes are limited by evaporation. The water and other
liquids in a bubble gradually evaporate and the bubble eventually loses its
stability and pops.
-
Freezer paper is the cheapest way
to accommodate little aspiring artists.
-
You can make face paints with
cold cr�me and a little food coloring. A touch of cornstarch helps make
it stay.
|