|
How
to Make Lotion
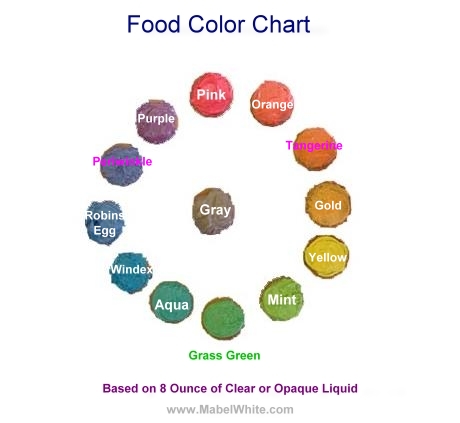
Food Color Chart
About Castile Soap Sculpting
Letter from the Editor: Easter
Thoughts and Mother's Day Planning by Deborah Dolen

Making chocolate Easter bunnies and such is the one
thing my kids really expect of me Easter of each year. As most
readers know, I am very anti-Paraffin (petrol, mineral oil) and so on.
That wax is used to harden a lot of commercial chocolate. Then
they have to nerve to make it "hallow." Believe it or not,
the best commercial chocolate is the Nestle chips. Coming
in white, dark and milk--this is the best chocolate for your
dollar. Melt in the microwave in 1/2 speed as not to scorch.
The best way to handle chocolate is to use small crock pots. The
"warm" setting is enough." Stir fairly regularly and dip away!
If you can find a good old fashioned rabbit mold, that will be a
family heirloom used over the years. You can even dip
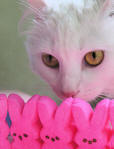
peeps in chocolate! Have a "Peeps" chocolate dipping party.
Use a crock pot at "warm setting." Dip in white chocolate, dark
chocolate and our milk chocolate. Food color can decorate the
white chocolate for cute designs in bright colors. Since
chocolate is oil based, you can also use any of our flavor oils.
Suggested flavor oils? Raspberry, tangerine, lemon drops, lime,
and
 marshmallow.
This is true for lip balm also, we love mixing tangerine with
marshmallow. It is so good, we end up eating the balm. marshmallow.
This is true for lip balm also, we love mixing tangerine with
marshmallow. It is so good, we end up eating the balm.
Ready to roast "peeps" over your gas stove flame?
We already did! We use metal skewers meant for the grill or
bamboo sticks. So beyond lots of eggs, buy some rock salt to
make bath salts (salt is salt is salt,) because you are going to want
some relaxation for the "after math." Bath salts and lotion are
so inexpensive to make, I am making some to "match" the Easter theme
over here and give to friends. I am also making bath fizzy
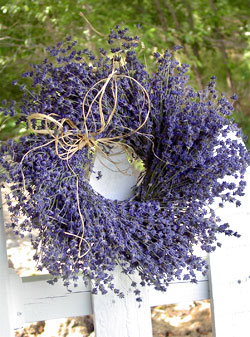
seltzers. Make some mint green bath salts and lotion to hand out for
St. Patrick's Day too! Mine colors will be lavender and mint
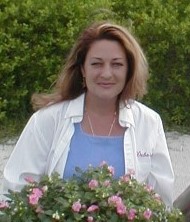
green for the most part. Speaking of "Lavender" click my photo
at the top of this newsletter for a surprise! Happy Easter
everybody!
 Deborah
Dolen, Editor in Chief Mabel White DIY Deborah
Dolen, Editor in Chief Mabel White DIY
Easter Cup
Cakes & Egg Decorating Ideas
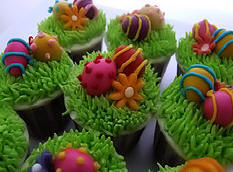 |
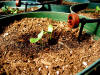
Here we
bought ready made cup cakes and lots of green frosting to make
grass. The grass does take some time! While the
grass was "drying" we decorated other candies, such as Jordan
almonds with more cake decorative icing-in colors such as
orange, fuchsia, turquoise and yellow. Then we topped the
grass with a few of our "gems" as well as a few already made
decorations we bought from a cake store. (Some of the
icing decorations went over to the bath fizzy making
department.) |
|
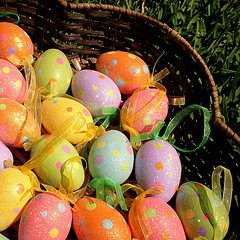
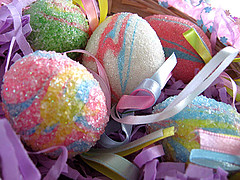
Mixing vibrant
colors is the first most important thing. A teaspoon of
vinegar in each color helps it "take." Below is a color
making chart I designed a few years ago to make color with food
dyes handy to most households.
For design you can tie
rubber bands around them and dip. Little kids can use
stickers. Advanced kids can roll away in colored sugar.
(You can make your colored sugar
too! Toss sugar with color in zip locks and allow to dry
on a tray.) Those who want to
"play it safe" can make polka dots. We did
beautiful colors and then rolled in plain sugar for a "morning
dew" look.
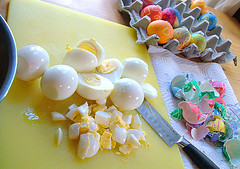
Then get ready to eat a
lot of funny colored egg salad! |
 |
 |
 |
 |
Color Made Easy: Using Water Based Food Color by
D.R. Dolen
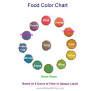 This article
really covers many spectrums that kids can appreciate as well as adults.
With Easter on its way this is even more interesting. This started
out as a vanilla cookie color wheel project developed by a teacher five
years ago. We added an answer key and the actual drops of food
color necessary to achieve colors. This chart was based on the use
of 8 ounces of clear or opaque liquid. It can be used for the
cookie color wheel project or This article
really covers many spectrums that kids can appreciate as well as adults.
With Easter on its way this is even more interesting. This started
out as a vanilla cookie color wheel project developed by a teacher five
years ago. We added an answer key and the actual drops of food
color necessary to achieve colors. This chart was based on the use
of 8 ounces of clear or opaque liquid. It can be used for the
cookie color wheel project or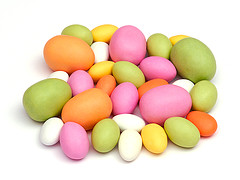 hung in your craft area to color shampoos,
conditioners, bath bombs, bath salts and body wash to name a few.
Unfortunately, these food color dyes cannot be used in any oil based
products such as balm.
Please click here to save
the full chart and answer key on your hard drive. Click
the thumbnail of the photo to get a better look. The same
coloration system can be used for bath salts, and bath bombs. hung in your craft area to color shampoos,
conditioners, bath bombs, bath salts and body wash to name a few.
Unfortunately, these food color dyes cannot be used in any oil based
products such as balm.
Please click here to save
the full chart and answer key on your hard drive. Click
the thumbnail of the photo to get a better look. The same
coloration system can be used for bath salts, and bath bombs.
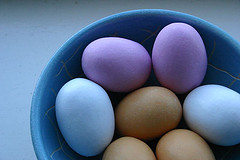
Shabby Chick
Easter Eggs: To the left we bought candy coated Jordan almonds and
then dyed our eggs to match those.
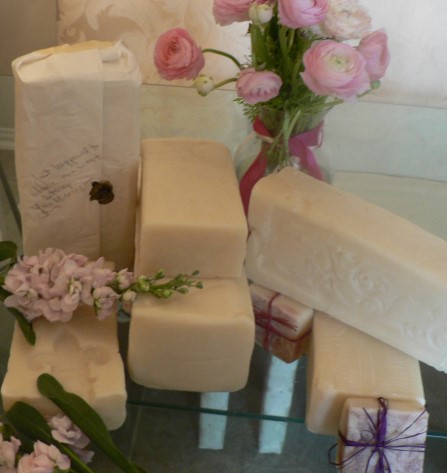
Castile Soap:
Slice it, Stamp it, Shred it, Sculpt it!
by Deborah Dolen
Let's start with soap. Everyone knows I adore
the liquid castile and it is used in every area of the home. I will
touch back upon that next. Hard form still has its purpose and there
are so many things that can be done with it!
 "Unscented
hard form castile soap is a material you can never waste, tire of or
not use. You will always use it! And like a fine wine, it
gets better with age. "Unscented
hard form castile soap is a material you can never waste, tire of or
not use. You will always use it! And like a fine wine, it
gets better with age.
You can stamp it, shape it, sculpt it, shred
it and gain a lot of therapy too!" You can even make
your own laundry detergent with it.
It is a project that can be done with kids, adults
or a personal journey.
The soap is delivered cured, but still semi soft.
It cuts like butter. Within the first few weeks of receipt, you
would want to cut it into cute shapes, whether rectangles or cute
cubes. I love the "cube" look-it reminds me of alphabet blocks
when we were kids. They look VERY classy and "different"
in the bathroom area.
You will then rest your
"masterpieces" on top of cabinets or places it will dry out of sight
yet still have ventilation. Trying to stamp them when they
are too soft
is not a good idea. However you can shred, mold or sculpt at
this point. You can make snow men and just a ton of neat shapes.
To make snowmen just shred and pack as hard as you can. I heat
my shreds up a tad in the microwave and pack them as hard as I can. Warm soap will
allow for some hard packing not possible with just cold shreds.
I prefer to stamp though, or to make a
mixture of squares and soap balls. Stamping looks rustic and
"real." Sometimes I stamp the balls too! Stamping is
best when they are 1/2 hard, usually 2 weeks in the air. This
also gives you valuable time to save up for a few soap stamps or
embossing pieces. They usually run under $10 each. Soap stamps are something you can keep for
life in a little box. I like Fleur
de Lyses, and a Royal Shell pattern. The " Bee" is
always a classic stamp too. I dip the stamps into a plate of corn
starch so it does not stick to the soap, and the cornstarch gives it an added
rustic look bringing out the emboss you choice. Some people dip
in micas. The more color the better your image will stand out.
You can even dip into gold mica, that makes for a beautiful emboss. 
Here are the first balls and blocks I did... click
photo to see enlarged detail.
Retailers can offer the basic castile soap for sale and
allow customers to "slice their own." Most importantly, I got
the price down on it also. The Mabel White Company is now the
biggest purchaser of bulk soap from Crafters and Farmers across
the county. They are made per our specs, shipped in and milled
at our refinery to be uniform. The program is specifically
designed to create jobs and avoid automation while also keeping costs
down. So, a pound of
fresh castile soap is $9 not including shipping. That is $2.25
for an average four ounce bar and retail on that is about $1.50-$2.00
a ounce these days-about $8 retail each. That is a high quality soap that is
vegetable based and has a significant amount of olive oil in the
formula.
The soap balls were made with just soap I had
laying around, I grouped into complimentary colors, shredded, added a
touch water and packed hard. They were mushy and took a good month to
dry. But they are so pretty I never use them. I named these
"Calico balls." I had been slow to post these because I am ever
weary of mass commercial grabbing my ideas. Most sites do not
even bother with content because I create markets for what they sell.
Since they did not invest much time, it is easy for them to be
"cheaper." This is the reason I am doing much more in retail and
far less in teaching. Click here to purchase
Castile Hard form soap.
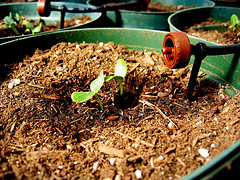
Spring Planting by
Deborah Dolen
 I am starting
Spring early and creating a whole new
herb garden. Last years herbs tasted "funny" although protected
on my lanai. It did not dawn on me until Ringo attended my last day of
clipping and lifted his leg. I totally had to block out how many
meals I had with my great "herbs." I am starting
Spring early and creating a whole new
herb garden. Last years herbs tasted "funny" although protected
on my lanai. It did not dawn on me until Ringo attended my last day of
clipping and lifted his leg. I totally had to block out how many
meals I had with my great "herbs."
On to a brighter
note, what shall we grow? Well, I use Basil a lot now,
preparing pesto once a week. Basil grows like all get out,
even in water. Mints also do this--and can be a
hydroponics thing in the kitchen. Mints are great for fresh tea.
I aim to find a good chocolate mint. If that don't work, I will
"spray" my mint with chocolate extract. You can bet I will! I
am not sure what that would do to the plant, but I will keep you
posted!
Cilantro is my next favorite, it gets used a LOT in my Thai and
Mexican dishes. Chives are always useful and Rosemary
and Oregano are runner ups--not used as much.
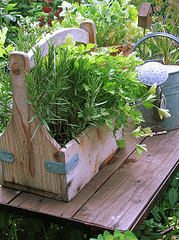
Mother's Day is coming up and making a big herb pot is always my
highlight gift. You can start now with small plants so the gift
is really bushy when you give it.
Sink
a big bow into it and hand over! Make two--you will want
to keep one. I may buy my starter herbs from the net
because commercial plants get so picked over--and the net offers more
variety. I have not tried these companies, but here is an
herb plant company
in FL. Park Seed
are also very god customers of ours, so click here for
Park Seed. Speaking of planting, find a space for
geraniums. They seem to bloom year round and we will be doing
projects this summer with them.
Making "Stuff"
by Deborah Dolen
Marshmallow & Tangerine
Lip Balm with Shea and Lanolin Oil
Our All Purpose Balm Base
is very hard because it is easier to add oil to soften (such as flavor
oil) then to add ingredients to harden, and because summer months
formulas do require less oil. Knowing that, I am able to add up
to 20% in shea and lanolin oil (mixed) and marshmallow/tangerine
flavor oil (mixed) to make an awesome healing and supple lip salve.
This particular formula also did OK in twist tubes also, just hard
enough to "take" to the threads. (Photo Below.)
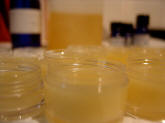
Essential Oils for the
Bath
Right now I am using a blend
of 75% Bulgarian Lavender to 25% Rosemary Essential Oil in
the bain. These two really help with relaxation and fending
off head aches. I had such head aches all week (just after
noon,) I kept Rosemary essential oil right by my PC to smell in.
It did help tremendously. When I use the Lavender blend in the
bath, I put 4 pipette fulls in the bath with lots of salts, or mix
this same amount into salts--if I want to color the salts. For
"flu" type feeling I switch to a blend of 75% Eucalyptus 15%
camphor and 10% lime essential oils. Because these
are stronger, I use 2 pipette fulls and create a real steamy bath.
It works GREAT. So, I keep old glass apothecary
bottle by the tub with these blends in them. I use clear glass,
colored is more of an old wives tale when it come to EOs.
Functional oils, I just got a hold of some
Lanolin
oil and I am ecstatic. I really like lanolin but the
sticky goop is hard to clean off after making products, so an oil
version is a lot easier to work with. In case
your are curious,
Shea oil
is also still my favorite carrier oil. It has all the properties
of shea, does make skin as soft as an infants, and is stable not crystallizing in final products, such as lip balm. I use
it straight up as a bath oil too!
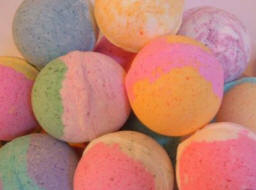 Making
bath bombs these days we do use a little Wilton cake decorating color to
achieve more vibrant colors when household food dyes are not vibrant
enough. Wilton products are available at most craft centers. Making
bath bombs these days we do use a little Wilton cake decorating color to
achieve more vibrant colors when household food dyes are not vibrant
enough. Wilton products are available at most craft centers.
Easter Bath Baskets I save the
"Easter" grass every year, as a way to "recycle" and my friends do not
mind. They know every event when I give a gift, I grab the
wrapping back sooner than they can open it! Make a "cubby"
zone of you do not already have one, to be a neat little hoarder and
blame it on "going green." Being "organized" does not make you
"look" like a pack rat with an OCD.
Anyhoooow, it takes under an hour to make a bunch
on neat looking bath bombs. Fill up a basket with grass and
arrange the bombs. Put a big bow on top...everyone loves bath fizzzies!
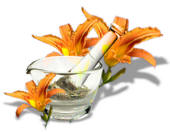
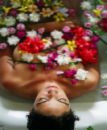
Spa Day by Deborah Dolen
 This is super easy and not as hard as hard as you
may have thought. GREAT as a Mother's Day activity. Having
some healthy tea and nourishment items may be the only area that needs
pre-planning. Buy some fresh flowers to lay around! Drop
rose petals all over the floor or one area room for the day. This is super easy and not as hard as hard as you
may have thought. GREAT as a Mother's Day activity. Having
some healthy tea and nourishment items may be the only area that needs
pre-planning. Buy some fresh flowers to lay around! Drop
rose petals all over the floor or one area room for the day.
I use to do this with my three daughters when they were
little and it is a REAL family binder. Twenty years later, I am
about to do this with some friends and co-workers. Alone?
Take the day off and do this yourself. Make a little designated
area in the house for your "Spa Day stash." For me, it is my
laboratory. I often do not enjoy everything I have in there, and
I am about to change that! Hello "Spa Day."
Massage
If you want to go all out, hire a masseuse in for a
few hours and they can bring their own table. Massage therapist
are beautiful people and usually will give you added ideas when they
see what your doing. You can negotiate, like $25 a person--they
will like the volume since they have to drive to one place anyway.
Try to get a referral from a friend. You can put them in a
bedroom area as not to be in the way. Beyond a masseuse, you may
want to hire a cleaning lady to come in and follow behind everyone.
This would take clean up totally off your shoulders.
To Start? Have everyone bring their
own robe and slippers, putting them on when they arrive. Have
what ingredients you need near each site--bathroom sink, kitchen sink,
and so on. Music! Pick something cool--maybe get a CD meant for
massage.
Exfoliate Entire Body - or Just Work on Facial
Exfoliation
 The first thing you want to do is exfoliate your
skin. You can make a scrub in the palm of your hand with ground
coffee, sugar or even salt. To make the paste we use vegetable
glycerin, at 1/3 the amount of dry material, but you can also use any
carrier oil--such as safflower, almond, grape seed. Vegetable
glycerin will make you skin smooth and soft. An example is
1/3 cup of vegetable glycerin to 1 cup of dry exfoliating material.
Take turns scrubbing in an empty bath tub, relax a few minutes to let
the good stuff absorb, and then rinse. Have a scrubby handy so
they can rinse the tub well for the next person, and perhaps 90% or
higher rubbing alcohol to sanitize the tub down. I keep mine in
a pretty vinegar bottle--but I let everyone know what it is.
Relax in Bath The first thing you want to do is exfoliate your
skin. You can make a scrub in the palm of your hand with ground
coffee, sugar or even salt. To make the paste we use vegetable
glycerin, at 1/3 the amount of dry material, but you can also use any
carrier oil--such as safflower, almond, grape seed. Vegetable
glycerin will make you skin smooth and soft. An example is
1/3 cup of vegetable glycerin to 1 cup of dry exfoliating material.
Take turns scrubbing in an empty bath tub, relax a few minutes to let
the good stuff absorb, and then rinse. Have a scrubby handy so
they can rinse the tub well for the next person, and perhaps 90% or
higher rubbing alcohol to sanitize the tub down. I keep mine in
a pretty vinegar bottle--but I let everyone know what it is.
Relax in Bath
Moisturize
When you are done exfoliating, use a quality
lotion to moisturize-your skin is ready to drink it in! Even
if you are going off to a massage, slather lotion all over your skin.
Steam
You can set up a real steamer at a table, or use
the stove. My stove is on an island-so I can have four facial
steam baths, aka (pots) going! Some people can bring their own
steamers to set up--they may have some at their homes. Steaming
loosens up dirt and grime. Oil helps impurities float to the
stop of the skin. Give your people their choice of
oil to slather on, while they are steaming. Clean the skin at a
sink and steam again. Spices and essential oils to
put in the steamers?
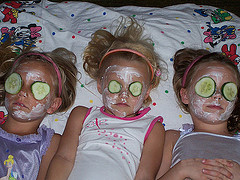
Mask
After cleaning the skin hourly and exfoliating, now
is the time to do a face mask. Rinse very well. Spray with
a lovely toner and moisturize. Cold sliced cucumbers for the
eyes.
 Hands and Feet Oh this gets dreamy.
You can take turns massage everyone's hands and feet or have a
masseuse do it. You can also warm stones in a crock pot, slather
oil on each other and rub the stones around. Hands and Feet Oh this gets dreamy.
You can take turns massage everyone's hands and feet or have a
masseuse do it. You can also warm stones in a crock pot, slather
oil on each other and rub the stones around.
To Do a "Soy DipTM" Warm the
SoySpaBathTM in a crock pot on Warm. It
will take up to 2 hours to melt--a higher temp will speed it up--but
never dip above 120 degrees or 49 Celsius.
Paint Shea Oil or Bee Pollen oil on each hand/foot before
dipping. It will truly produce baby soft hands for days. If you
dip without oil or lotion, that will cause dry hands--the wax will
draw moisture from your hands.
See
Spa Party video with Lisa
Kasanicky
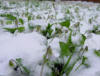
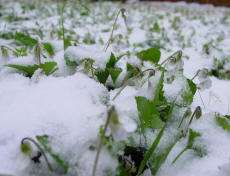
| Stupid Snow |
Hope |
Hanging On |
The Troth |
 |
 |
 |
 |
|


 :
:
 Deborah
Dolen is the
Editor in Chief for Mabel White DIY and author of
over 25 DIY books, 1,000 articles and several TV "how to" Films.
Deborah Dolen is also an environmental writer and has
her own content syndication. Deborah Dolen was widowed
when she was on her 30's and went on to raise three
great daughters in FL up against many obstacles. This
is the time period she generated her most fascinating DIY books.
Deborah
Dolen is the
Editor in Chief for Mabel White DIY and author of
over 25 DIY books, 1,000 articles and several TV "how to" Films.
Deborah Dolen is also an environmental writer and has
her own content syndication. Deborah Dolen was widowed
when she was on her 30's and went on to raise three
great daughters in FL up against many obstacles. This
is the time period she generated her most fascinating DIY books.